Apple’s iMovie can be confusing to use especially if you don’t use it often. Apple has changed the sequence of steps and the way files are organized. This outline shows how to quickly edit a movie and archive the files so as not to waste all the space on your Macbook drive.
Copying the clips to the computer
1. Create a folder under Movies (example 201506 wedding Sally video clips)
2. Insert the SD card with the video clips and copy all video clips to this new folder
3. Open iMovie and select File, Open Library, New and name the library the same as the clips folder (example 201506 wedding Sally). This library will eventually be a self-contained copy of all of your clips and the project and event work done in iMovie.
4. Create a new Event by clicking File, New Event naming it the same thing (201506 wedding Sally). iMovie will show a button to import and click that button. It will ask you for the clips and point to the folder created in step 1.
5. Create a new edit by clicking File New Project. When prompted for a name, use the same one again (201606 Sally wedding).
Editing a video
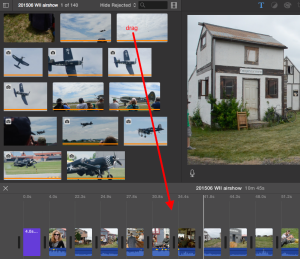
6. Drag clips from the Event in the upper left to the timeline below. Alternatively, click Edit, Select All and add them all in at once if most of the clips are good.
7. Play the video by hitting the Space bar. If there is a clip you don’t want, click it and hit Delete.
8. To shorten a clip in either the Event window or Project window, drag the yellow box.
9. There is a lot more you can do (title, volume, transitions) but the above steps are the basics.
Creating a video
10. Now you want iMovie to create a single video with all of your edits. Click File, Share, File.
11. It will take minutes to an hour to create this file. The progress can be seen in the upper right of iMovie with a pie-shaped status symbol. Once done, a popup will appear and you can then test and upload your final video.
Rational for all of these steps
Following these steps creates 3 things to be backed up for future use.
1. The folder with the original video files untouched. In the future you may not use iMovie then this folder is your starting point for another application.
2. A single file with all of the videos optimized by iMovie plus all of your edits. This library file can be opened in the future if you want to create a new version of your video without redoing the editing.
3. A single file that is your edited video for sharing. This is what people watch or upload to Youtube.
Backup and Archiving
All Macbooks have solid state rather than spinning hard drives. The only downside to solid state is there is significantly less storage space. Because video takes up many gigabytes per hour of footage, a way to move off videos to a external drive or server is needed. In the above structure, simply move the file and folder. If in the future an edit is needed, move them back on to the laptop Movie folder.
